Building a Crosscut Sled
Introduction
Welcome to my woodworking journey! Today, I’m excited to share how I transformed a simple idea into one of the most useful jigs in my shop: a 90-degree crosscut sled. This isn't just about precision; it's about enhancing safety and functionality in your woodworking projects. Watch the full tutorial video on YouTube: Crosscut Sled Tutorial
Watch the Tutorial
The Anatomy of the Crosscut Sled
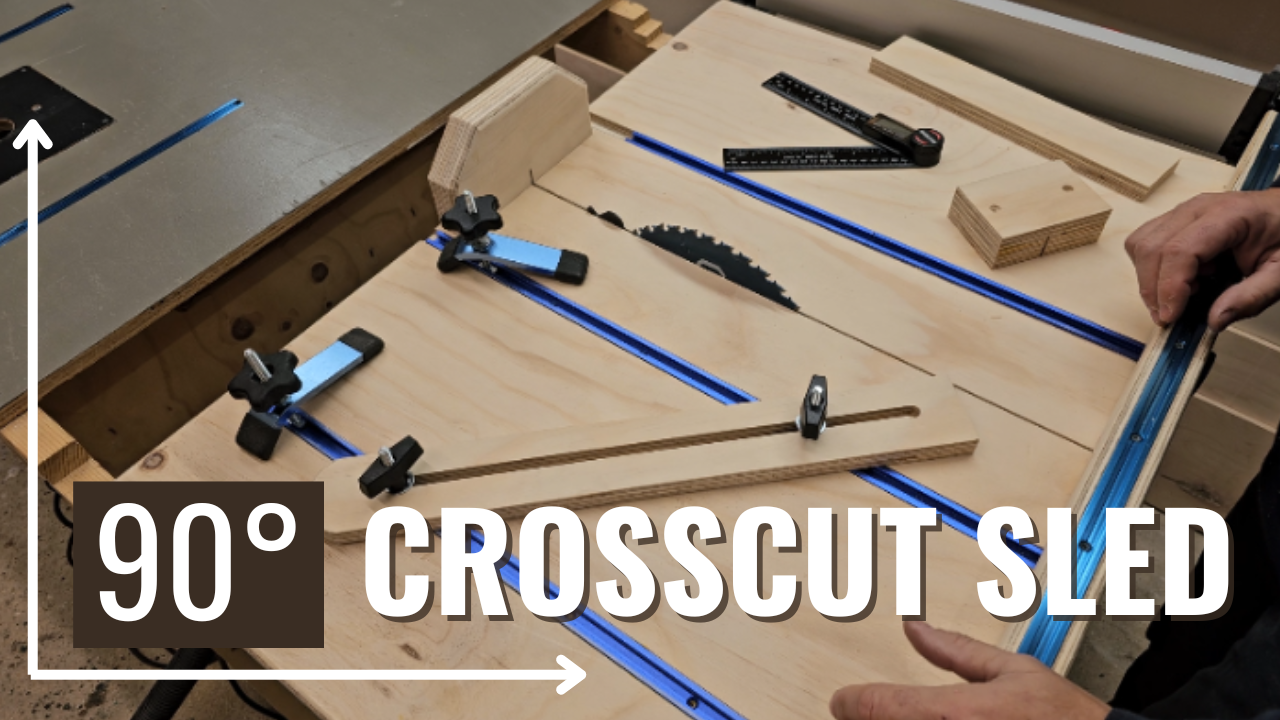
Building a crosscut sled involves a few essential components:
- A Flat Base: The foundation of your sled.
- Runners: These fit into the miter slots of your table saw.
- Front and Back Fences: For accuracy and support.
- Blade Guard: A crucial safety feature.
Enhancements for Your Sled
To take your sled to the next level, consider adding:
- T-Tracks and Clamps: Ideal for securing small parts and using a stop block.
- Fence Extensions: Handy for dealing with longer cuts.
- Miter Cutting Board: For consistent miter cuts.
Inspiration and Smart Design
My inspiration came from various sources, notably Tamar's crosscut sled design, which brilliantly incorporates close-set T-tracks and clamps for maximum utility without compromising safety.
Building the Sled: Step-by-Step
- Determine the Size: Based on your specific needs.
- Cut the Base Panel: But not to the final dimensions yet.
- Prepare the Fences: Cut and glue up the front and back fences.
- Make the Runners: Using materials like plywood for perfect fitting.
- Layout and Install T-Tracks: If using, route channels for the tracks.
Key Assembly Steps
- Install the Runners: Ensure they are slightly raised for smooth gliding.
- Attach the Front Fence: Carefully avoiding interference with T-tracks.
- Cut the Base to Final Dimensions: Keeping layout lines in mind.
- Install the Back Fence: Using a square for perfect alignment.
Fine-Tuning with the 5-Cut Method
This method is crucial for ensuring your fence is perfectly square to the blade. It involves making sequential cuts and measuring the differences to adjust the fence alignment accurately.
Final Touches and Adjustments
- Install a Blade Guard: For safety.
- Add Enhancements: Like T-tracks or a miter block, based on your requirements.
- Wax Everything: For smooth operation.
Reflection and Improvements
In hindsight, there are a few things I’d tweak in future builds, such as adding an opening for T-bolts and possibly making the fence taller. Every project is a learning experience!
Conclusion
And there you have it – a simple yet effective crosscut sled that will revolutionize how you make 90-degree cuts on your table saw. Not only does it increase accuracy, but it also ramps up the safety and versatility of your saw. Happy woodworking!